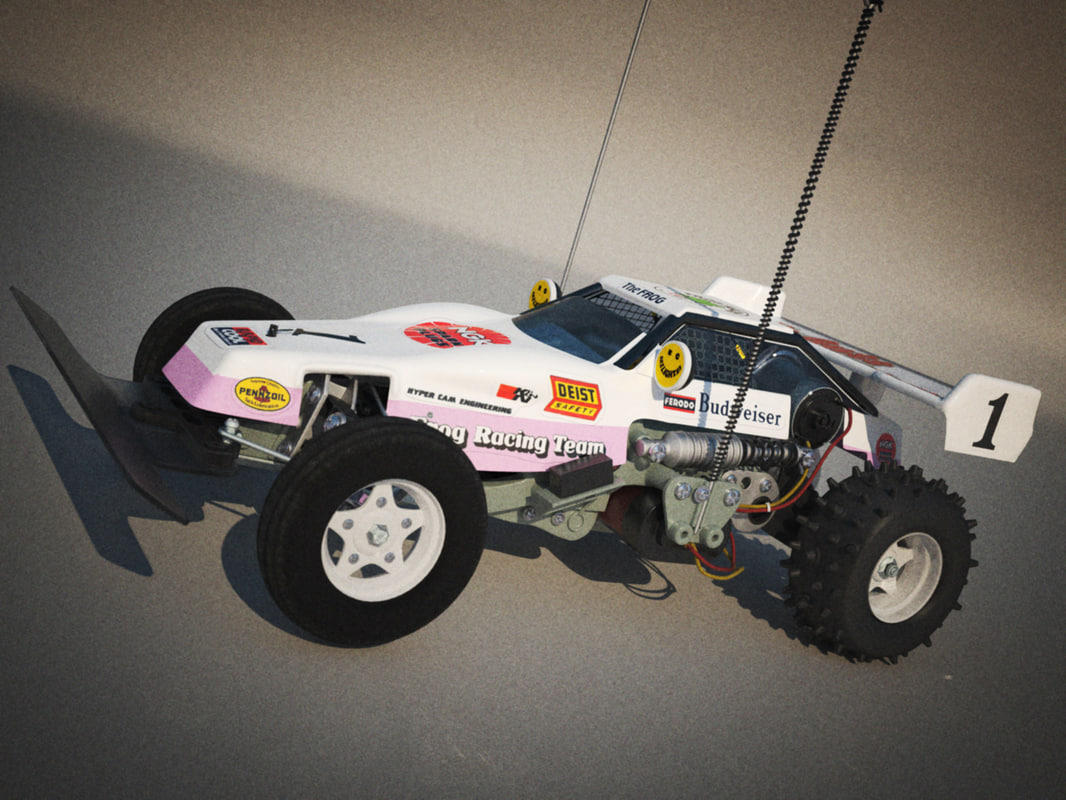
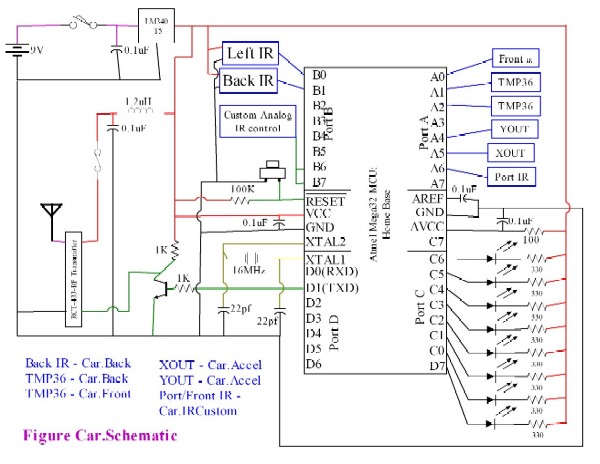
radio control car 3d model Circuit Diagram In this video tutorial we build a basic Remote-controlled Car out of PVC with steering on a budget. This DIY RC Car build is technically the heavily-improved
Driving and Maintaining Your RC Car 1. Safely Operating Your New RC Car. Now it's time to safely drive your newly built RC car! Find an open area away from traffic to run the car at higher speeds. Always turn on the transmitter before the receiver so the failsafe is active. Start slowly and work up to higher speeds once you gain confidence.

driving RC car! And a complete guide to build your own. Circuit Diagram
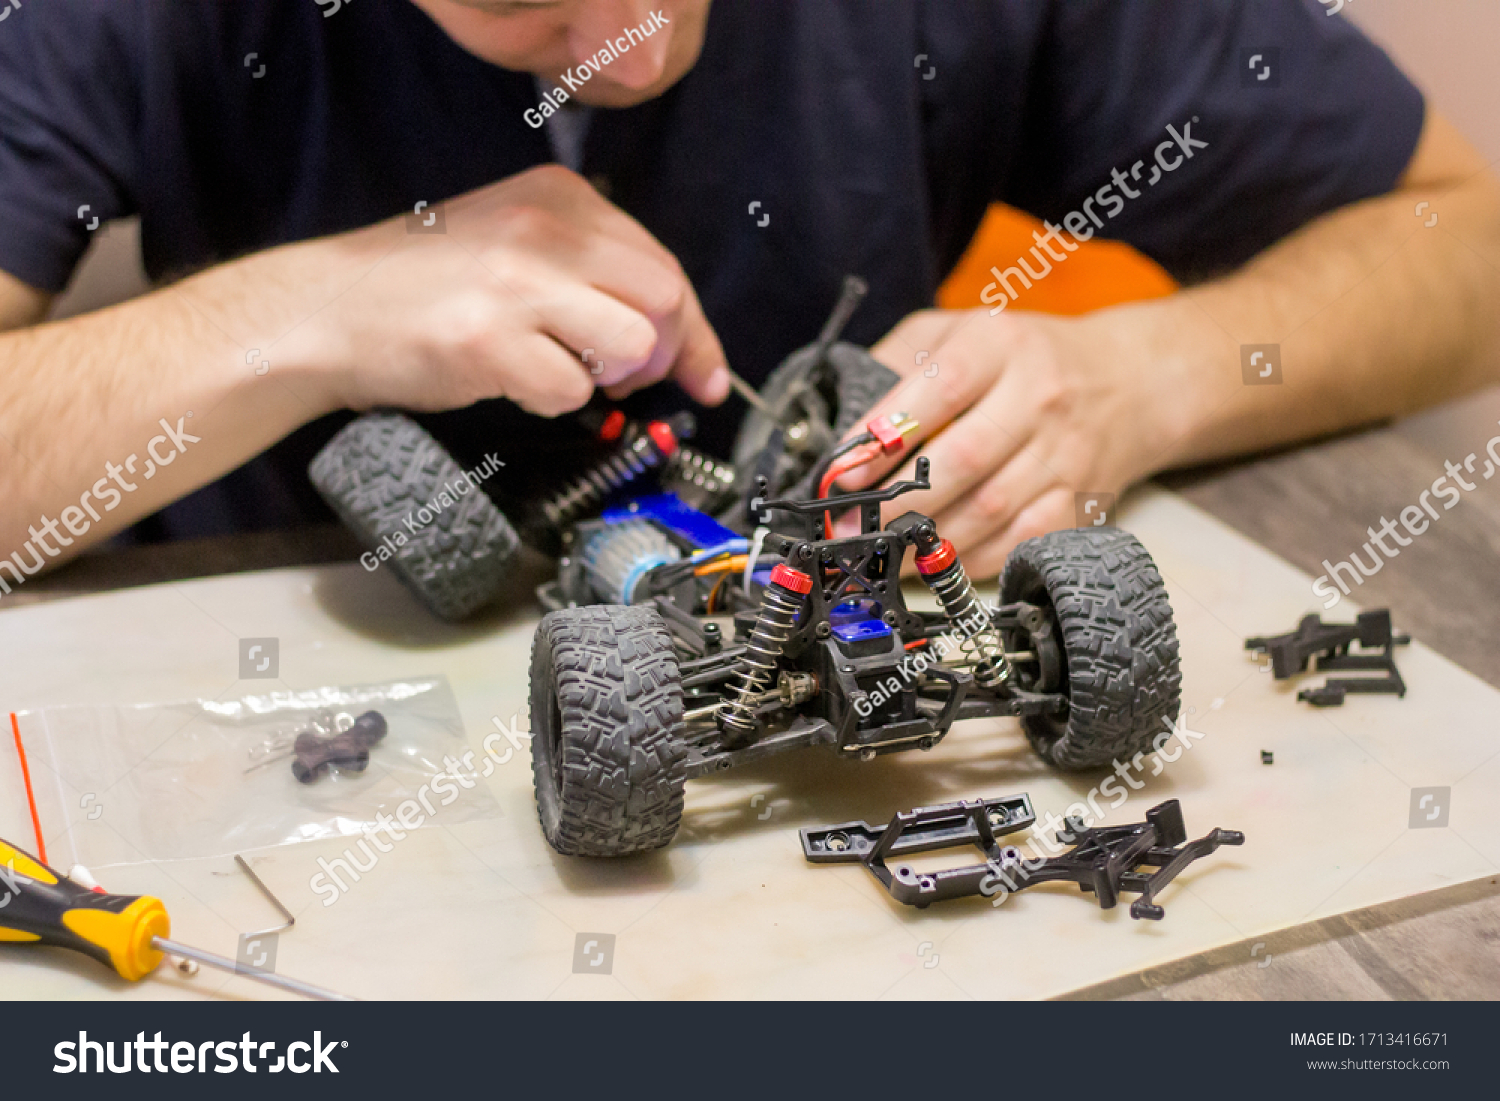
Make any necessary adjustments to fine-tune the car's behavior. This step ensures that your RC car is ready for the track or off-road adventures, providing an enjoyable and smooth driving experience. Remember, each RC car model may have unique assembly requirements, so always refer to the specific instructions provided by the manufacturer.
The Final Word: Unleash Your Inner Engineer. Building an RC car from scratch is a rewarding journey that combines creativity, engineering, and a passion for speed.From designing your dream car to witnessing its performance on the track, every step of the process is an exciting adventure. So, embrace the challenge, unleash your inner engineer, and experience the thrill of building and racing How to Design and Build a 3D Printed RC Car: A Complete Guide from CAD to Assembly. Designing and building a custom remote-controlled (RC) car can be a rewarding project combining creativity, engineering, and technology. This guide aims to walk you through the entire process, from initial CAD designs to testing the functionality of your RC car, utilizing 3D printing and CNC machining techniques.
Design and Build a Custom 3D Printed RC Car: The Complete Guide Circuit Diagram
First, I had to assemble the RC car model: Then I had to figure out how to mount the rest of the "smarter" hardware on it, so I made a 3D model: The first few iterations were 3D printed: And the final tested design was built using aerospace aluminium: Then the Jetson Nano and the I²C/PWM Servo driver were mounted on the board:
